Master Deba Knife Sharpening: Beginner-to-Advanced Guide
Deba knife sharpening is an essential skill for anyone who loves Japanese cuisine and wants to learn how to sharpen a Japanese knife for precise cuts when filleting fish or preparing sashimi. This single-bevel knife, known for its heft and curved blade, is specifically designed to handle tough ingredients while delivering clean, accurate slices.
Whether you’re a beginner exploring the world of Japanese kitchen knives or an experienced chef looking to refine your technique, understanding the fundamentals of proper blade angle, consistent pressure, and optimal whetstone grit will significantly elevate your cutting performance.
In this comprehensive Beginner-to-Advanced Guide, we’ll walk you through every stage of Deba knife sharpening—from selecting the right whetstone (coarse, medium, and fine grit) to mastering single-bevel polishing. You’ll learn how to hold the Deba knife firmly, maintain a stable angle, and apply even strokes across the surface of the whetstone.
We’ll also cover common pitfalls to avoid, essential maintenance tips to prolong your knife’s lifespan, and advanced methods for those looking to perfect their technique in professional kitchens.
For those who prefer a hands-on tutorial, we’ve included a helpful video demonstrating the key techniques. Be sure to check it out as you sharpen your Deba knife and refine your skills.
Key Features and Importance of Deba Knives
The deba knife is one of the essential tools in Japanese cuisine, requiring proper maintenance to preserve its unique characteristics. In this section, we will delve into the fundamental features of the deba knife and the importance of sharpening it correctly.
What Is a Deba Knife?
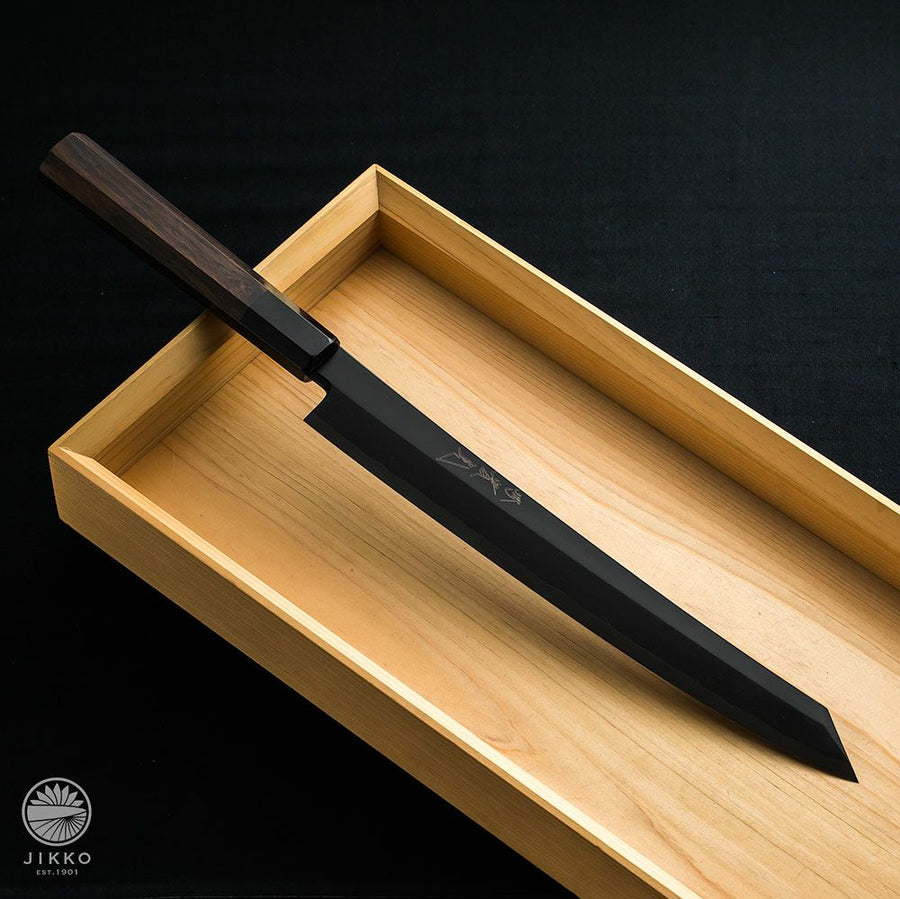
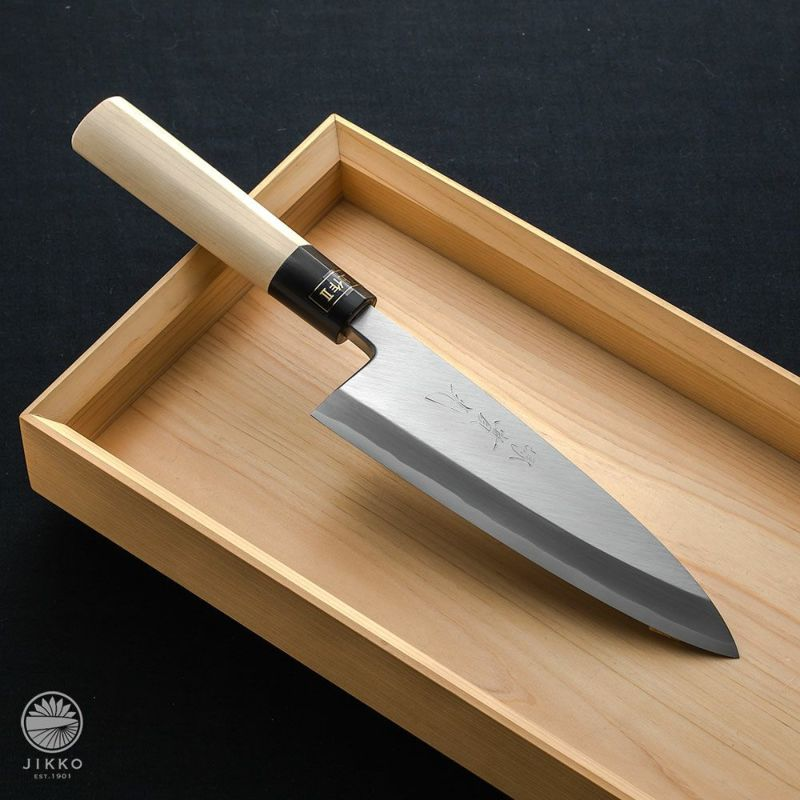
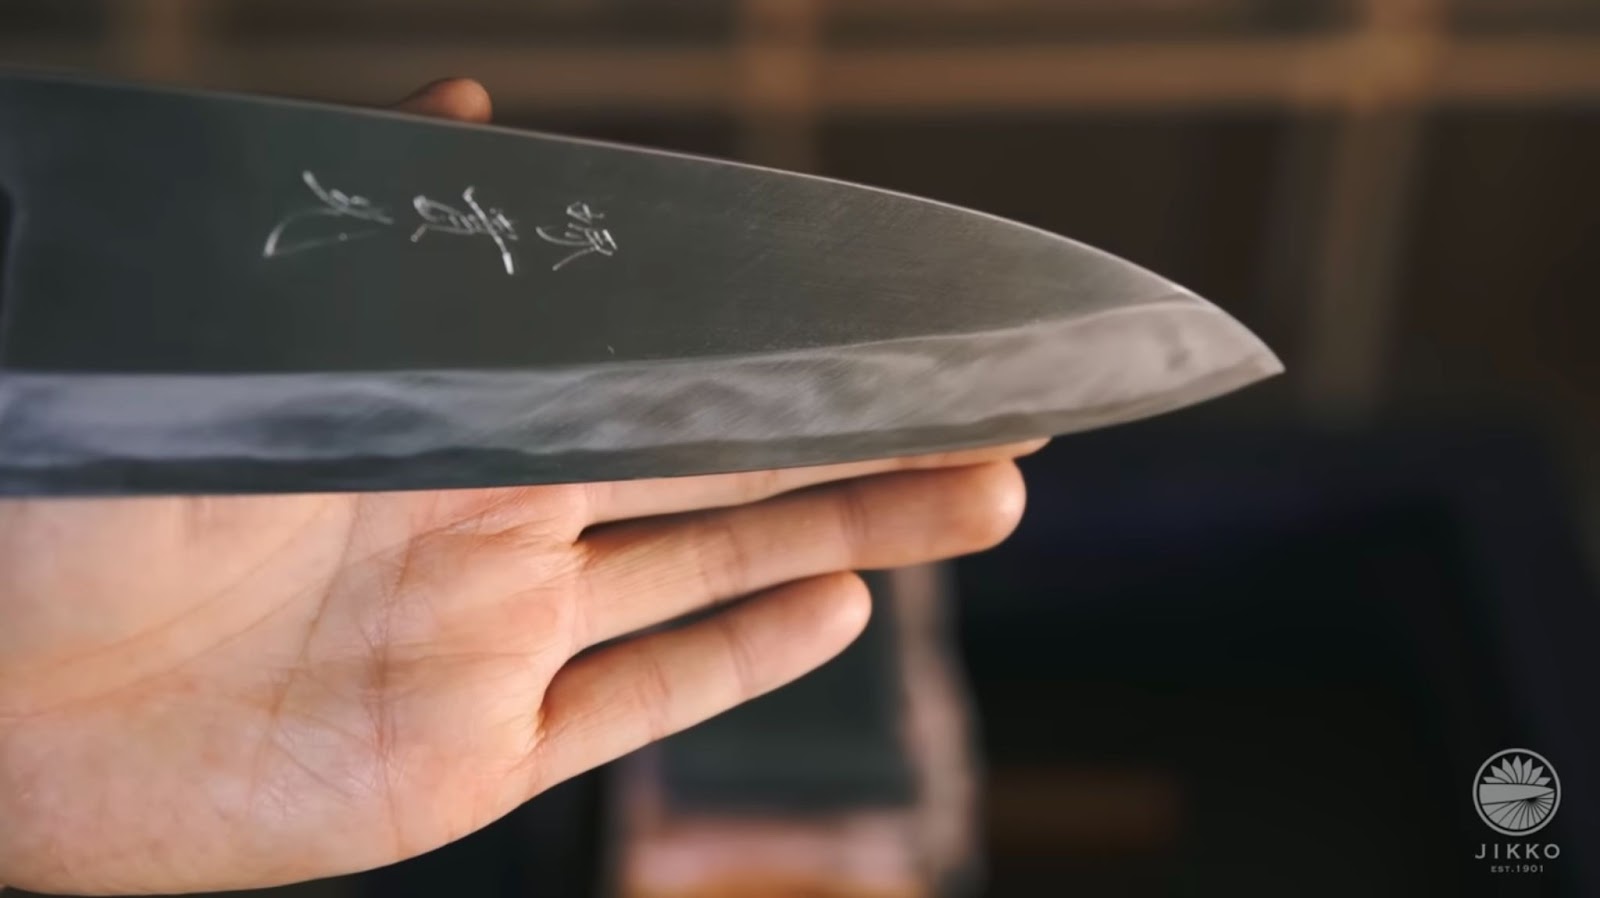
The deba knife is a type of traditional single-bevel Japanese knife primarily used for filleting fish. Its thick and sturdy blade makes it suitable for cutting through fish bones and other hard materials. Thanks to its single-bevel design, it offers sharp cutting performance and allows for precise work.
-
Thick blade : the blade of a deba knife is crafted to be exceptionally thick, allowing it to cut through fish bones and tough parts with ease. This robust design makes it ideal for processing large fish or handling bone- in meats with confidence.
-
Single-Bevel Design : The deba knife features a single-bevel structure, with one side sharpened to a fine edge and the other side having a hollowed area known as ura-suki. This design allows the knife to penetrate ingredients easily and ensures precise cuts. As a result, it is perfect for tasks that require detailed work and accurate slicing in culinary preparations.
-
Uses : While primarily used for filleting fish, the deba knife is also suitable for cutting bone-in meat and tough vegetables. It is an essential tool for handling fish, especially when delicate and precise work is required.
Why Sharpening a Deba Knife Matters
Each time a knife is used, its blade becomes duller. This is particularly true for deba knives, as they are frequently used to cut through fish bones, which accelerates wear and tear on the blade. Sharpening the blade properly offers the following benefits:
-
Maintaining Sharpness : By keeping the blade sharp, cutting tasks become smoother, allowing you to slice ingredients without crushing them. This ensures that the flavor and appearance of the ingredients are preserved during preparation.
-
Improved Cooking Efficiency : A sharp knife requires less force to cut, which enhances the efficiency of cooking. This leads to faster meal preparation and reduces fatigue during the process. Additionally, a well-sharpened blade allows for straight and thin cuts, ensuring precision in slicing and improving the overall quality of the dish.
-
Ensuring Safety : A dull blade is more prone to slipping, which increases the risk of injury. By maintaining a sharp edge, you can make accurate cuts, allowing for safer and more controlled cooking.
-
Extending the knife’s Lifespan : By performing regular and proper maintenance, you can prolong the knife’s lifespan. Neglecting to sharpen the blade can cause deep damage, which may eventually make the knife irreparable.
By understanding the characteristics of the Deba knife and the importance of proper maintenance, you can enhance the quality of your cooking and extend the lifespan of your knife. Next, we will provide a detailed explanation of the specific sharpening techniques.
Beginner’s Guide: Basic Deba Knife Sharpening Techniques
Now, I would like to introduce how to sharpen a Deba knife. Since a Deba knife is used for cutting hard ingredients, the edge can often become dull, so it needs to be sharpened frequently. I will explain the sharpening method in an easy-to-understand manner, even for those who do not know how to sharpen a knife or are sharpening a knife for the first time, incorporating photos and videos as well.
Essential Whetstones and Knife-Holding Tips
First of all, I will introduce a sharpening method for beginners. We will use the following two types of sharpening stones.
|
No.1000(Medium Whetstone) |
No.6000(Finishing whetstone) |
|
|
|
Preparation of the whetstones
First, we will use a medium whetstone (No. 1000). Begin by flattening the surface of the sharpening stone (flattening). If you sharpen the knife without leveling the surface of the stone, the knife may become warped, so we will use a dedicated flattening stone to level it.
|
Flattening stone(Rough whetstone) |
Flattening stone(medium・finishing whetstone) |
|
|
|
How to hold the knife
The way to hold a knife is as follows. When you hold the knife correctly, it becomes stable and does not wobble, making the sharpening process easier.
|
Hold the handle with your middle finger, ring finger, and little finger |
|
|
Place your index finger on the back of the knife |
|
|
Place your index finger on the back of the knife |
|

How to use a Whetstones
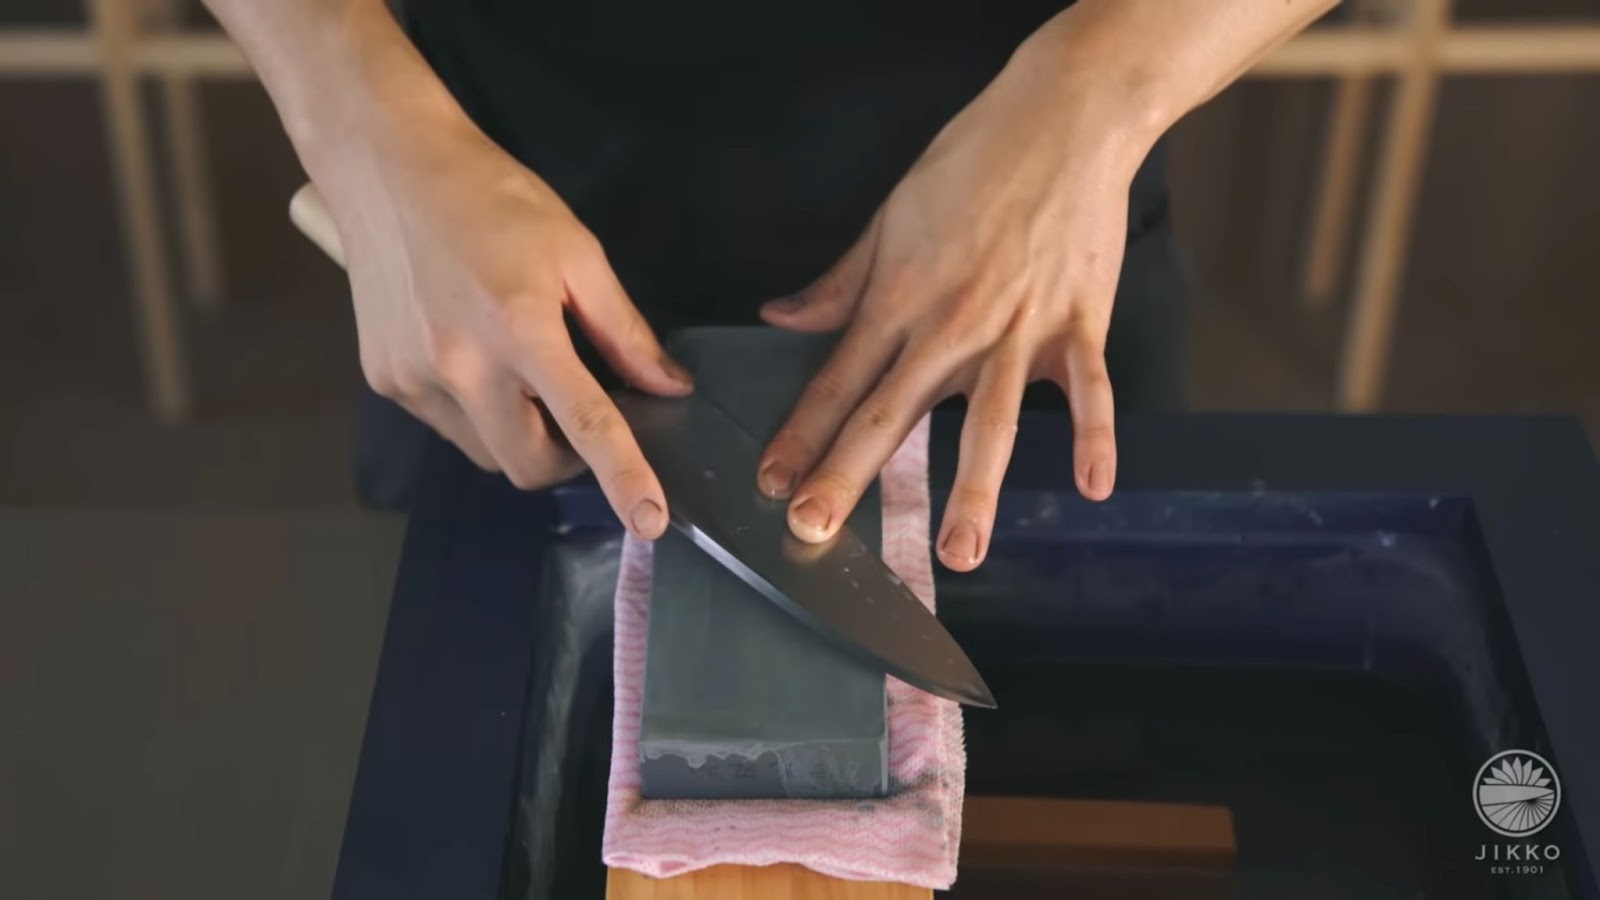
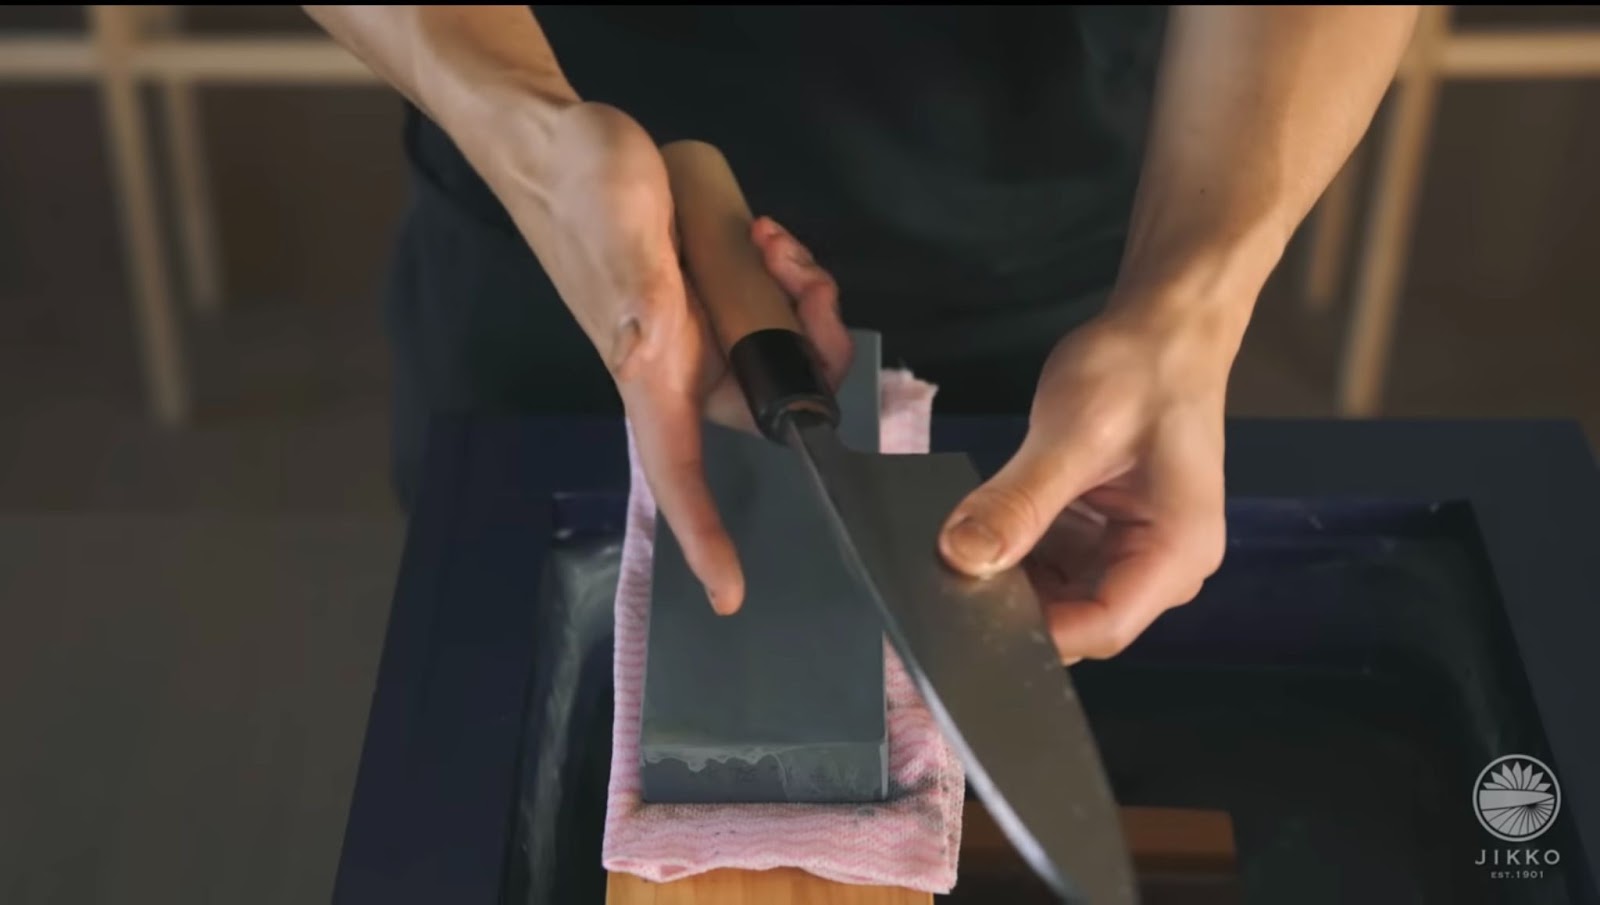
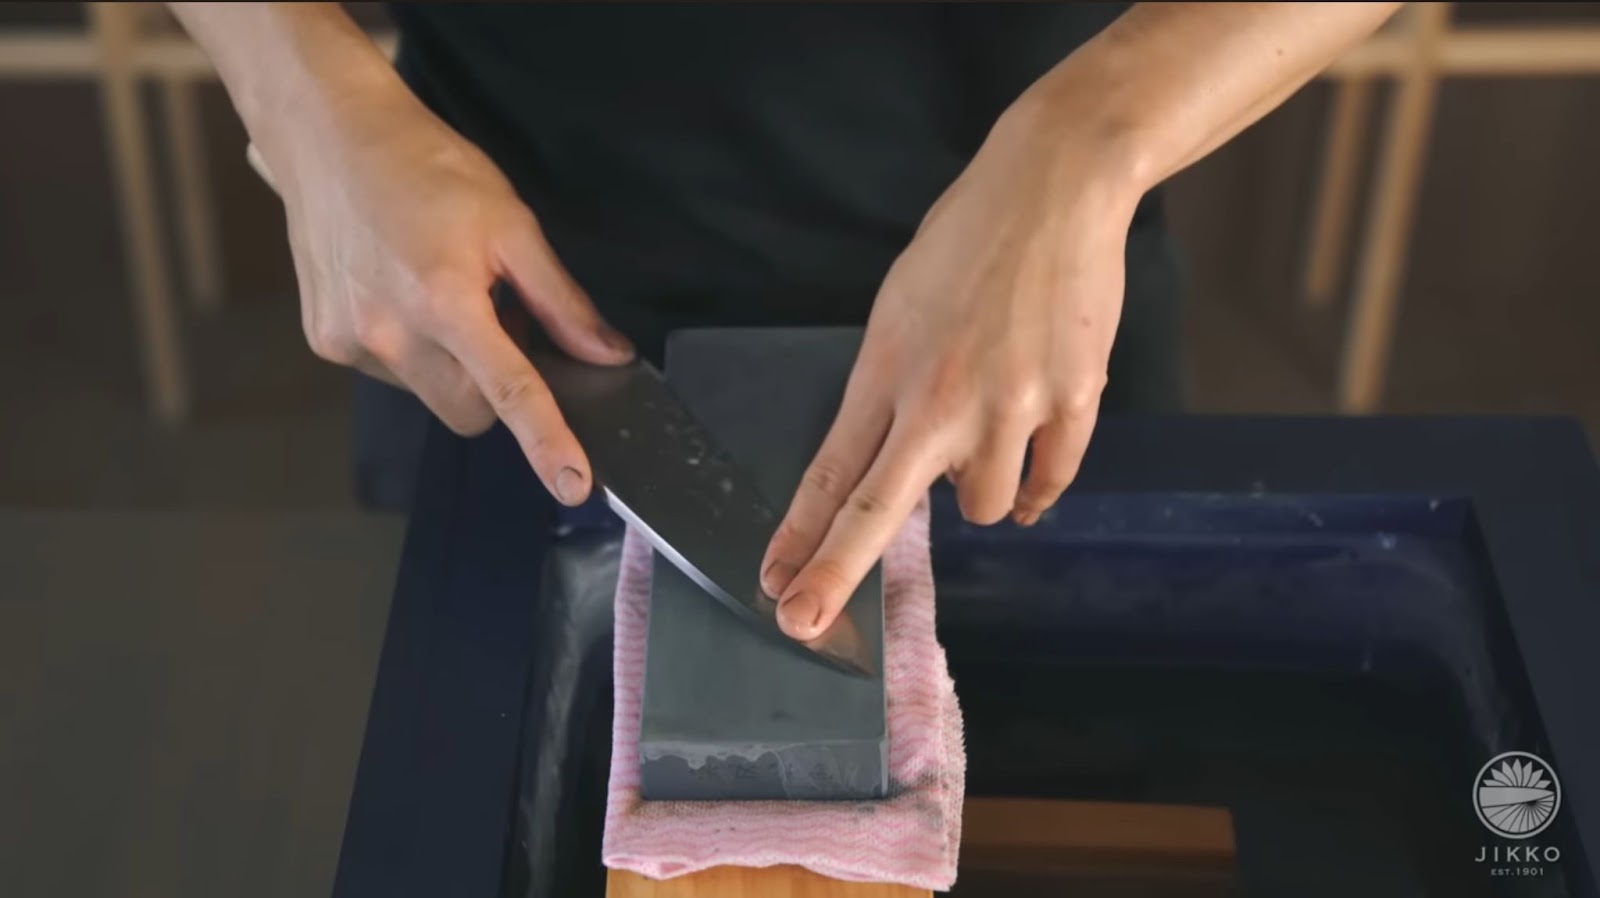
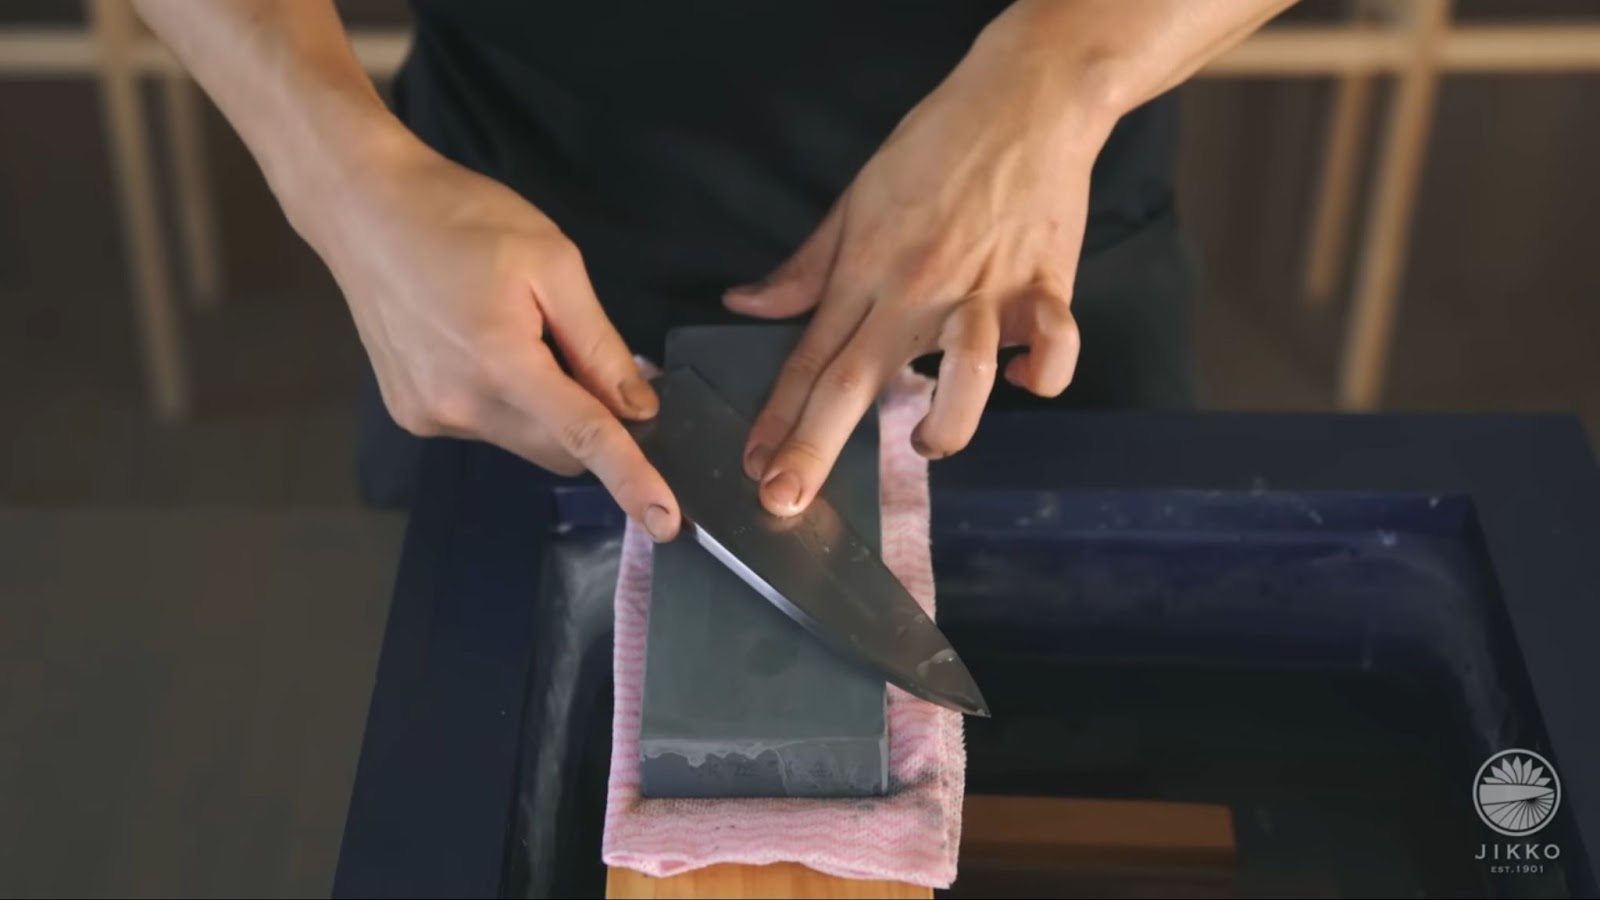
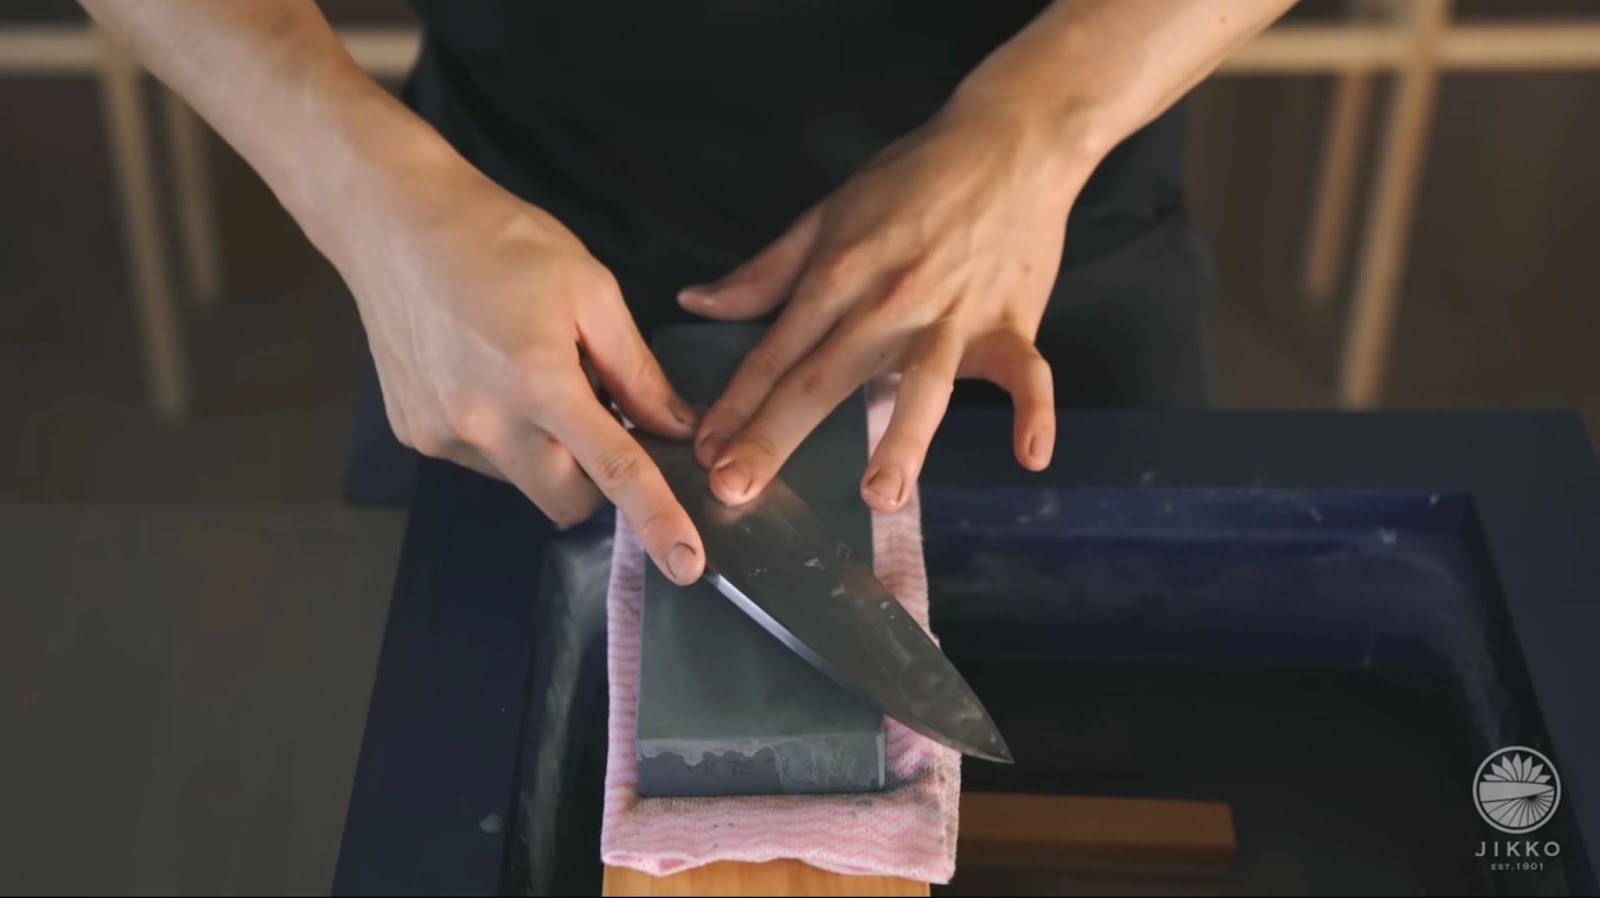
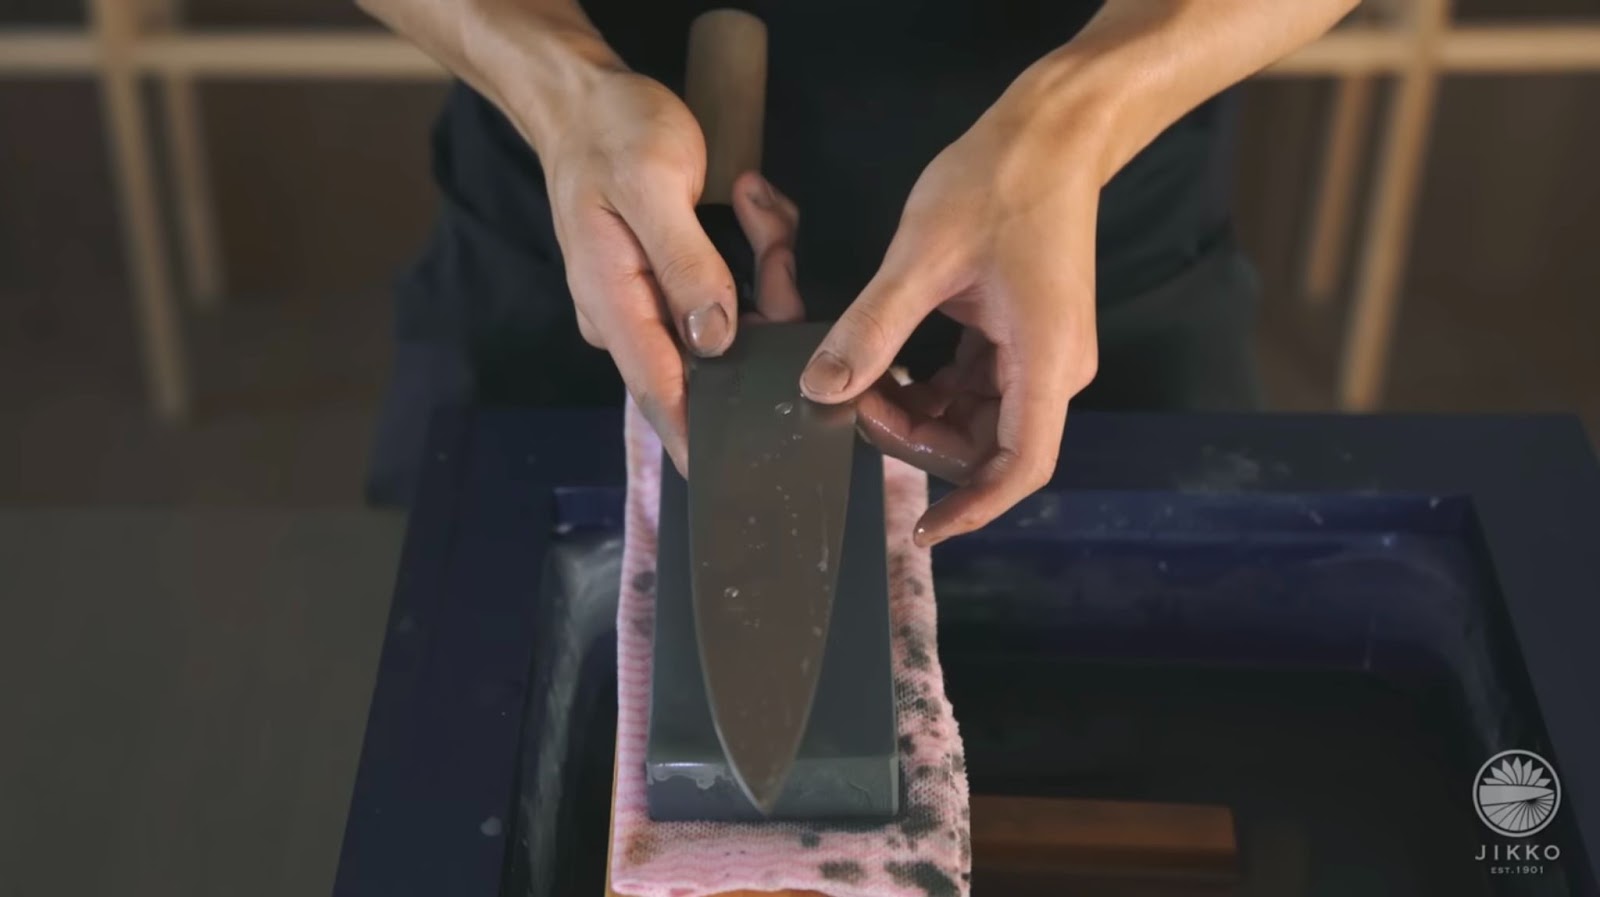
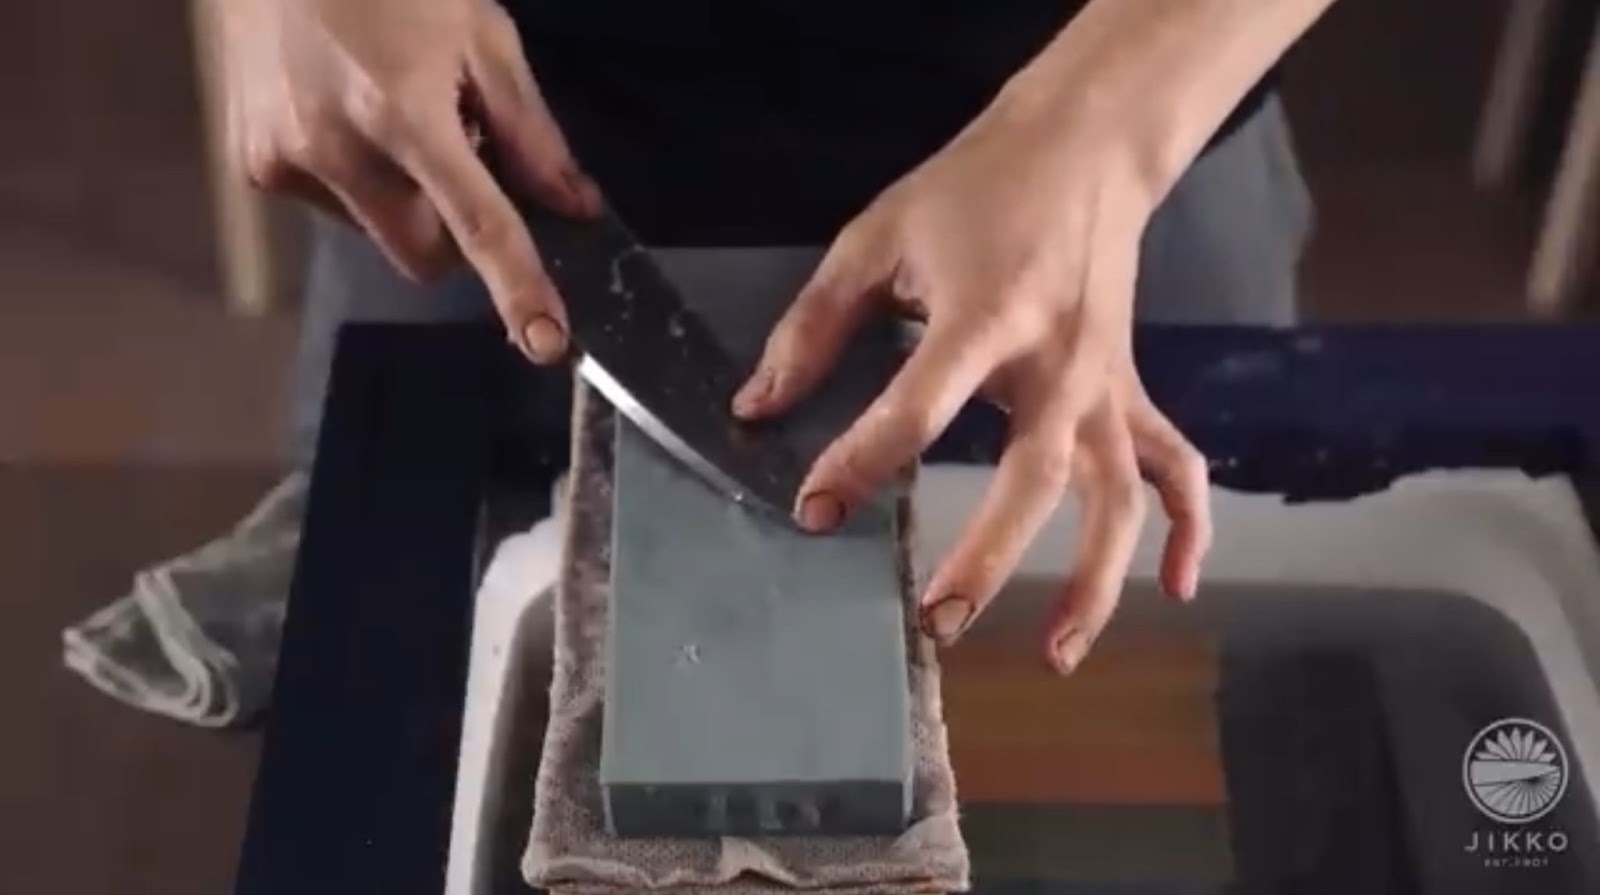
Soak the whetstone until no more bubbles appear before use. The angle of the knife should be 45 degrees in relation to the whetstone. When you firmly press the bevel of the blade against the stone, the knife will lift slightly, indicating that the angle is correct.
Step-by-Step Process for Sharpening a Deba Knife
Start sharpening from the tip of the knife, and the placement of your left hand on the knife is important. Place your left hand’s fingers on the backside of the bevel, near the tip of the knife, to begin sharpening. The area where your left hand is placed will be the part of the blade that gets sharpened, so it is recommended to move your fingers in small increments and sharpen in sections.
As you become more experienced, you will be able to slide your left hand and sharpen more smoothly.
|
The tip of the blade |
|
|
Middle of the blade |
|
|
The heel of the blade |
|
The number of sharpening strokes.
Start by sharpening from the tip of the blade. Since the tip is harder to make contact with the whetstone, use your left hand to guide the fingers to the tip, slightly tilting the knife forward. Once you confirm that the tip is in contact with the whetstone, begin sharpening.
【Check the sharpening process in the video】
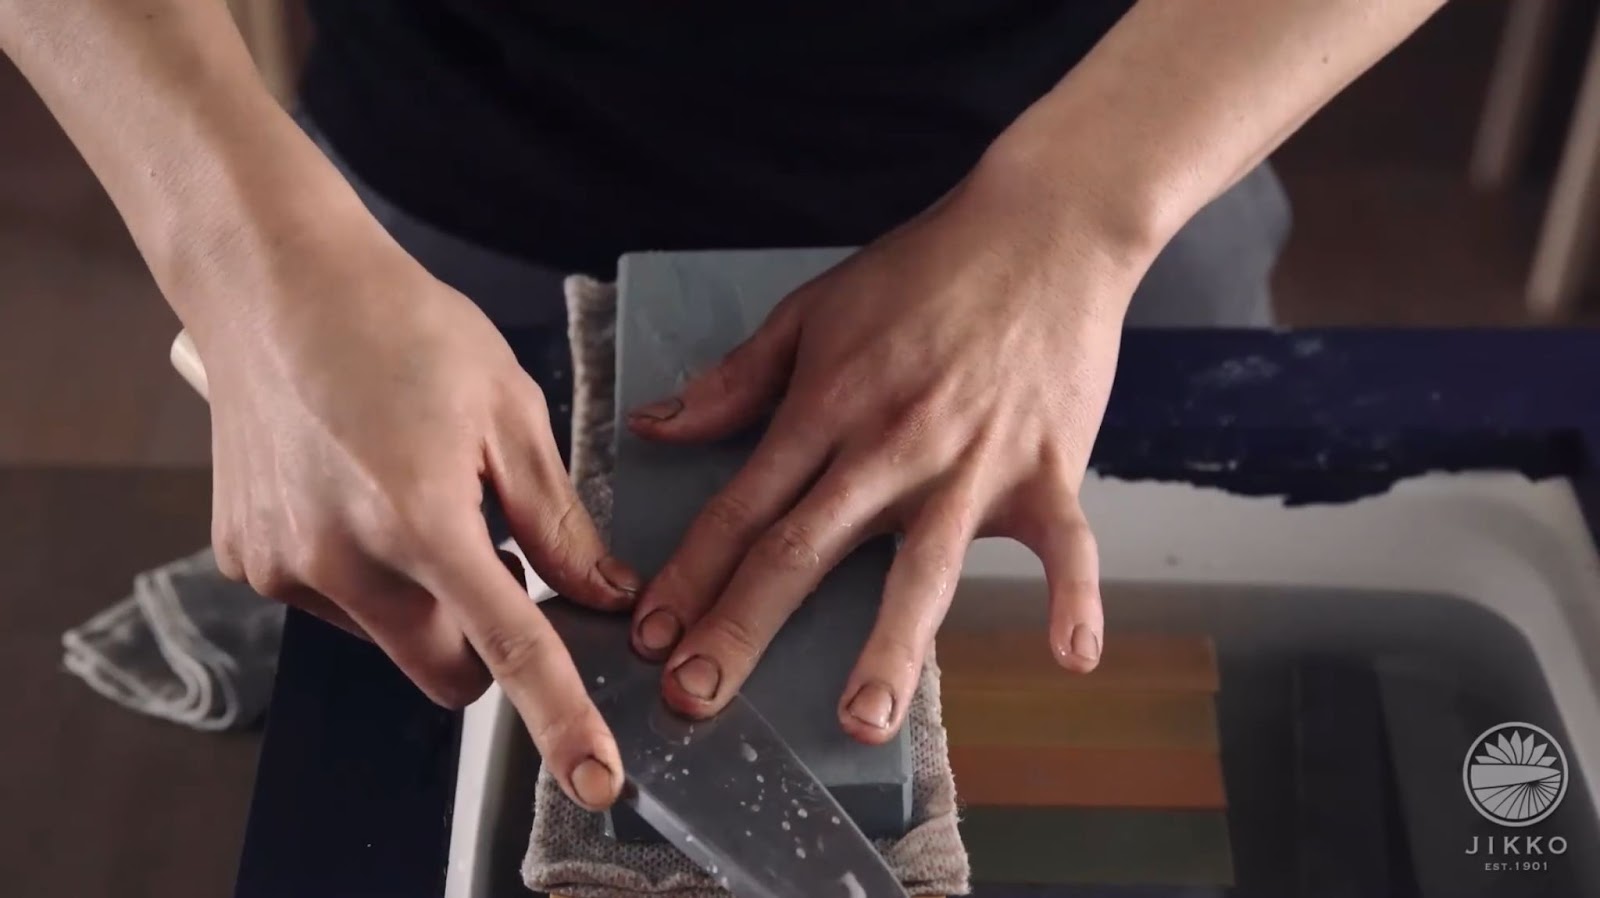
Checking for burrs(Kaeri)
After sharpening, check if burrs (the edge formed after sharpening) have appeared. To do this, place your thumb parallel to the knife blade and slowly slide it across. You will be able to feel the burrs. If burrs are present along the entire edge, the sharpening process is complete.
If no burrs are present, it means the blade has not been fully sharpened yet. If burrs are missing only in certain areas, avoid sharpening just those parts as it may distort the blade's shape. Instead, sharpen the entire blade evenly again.
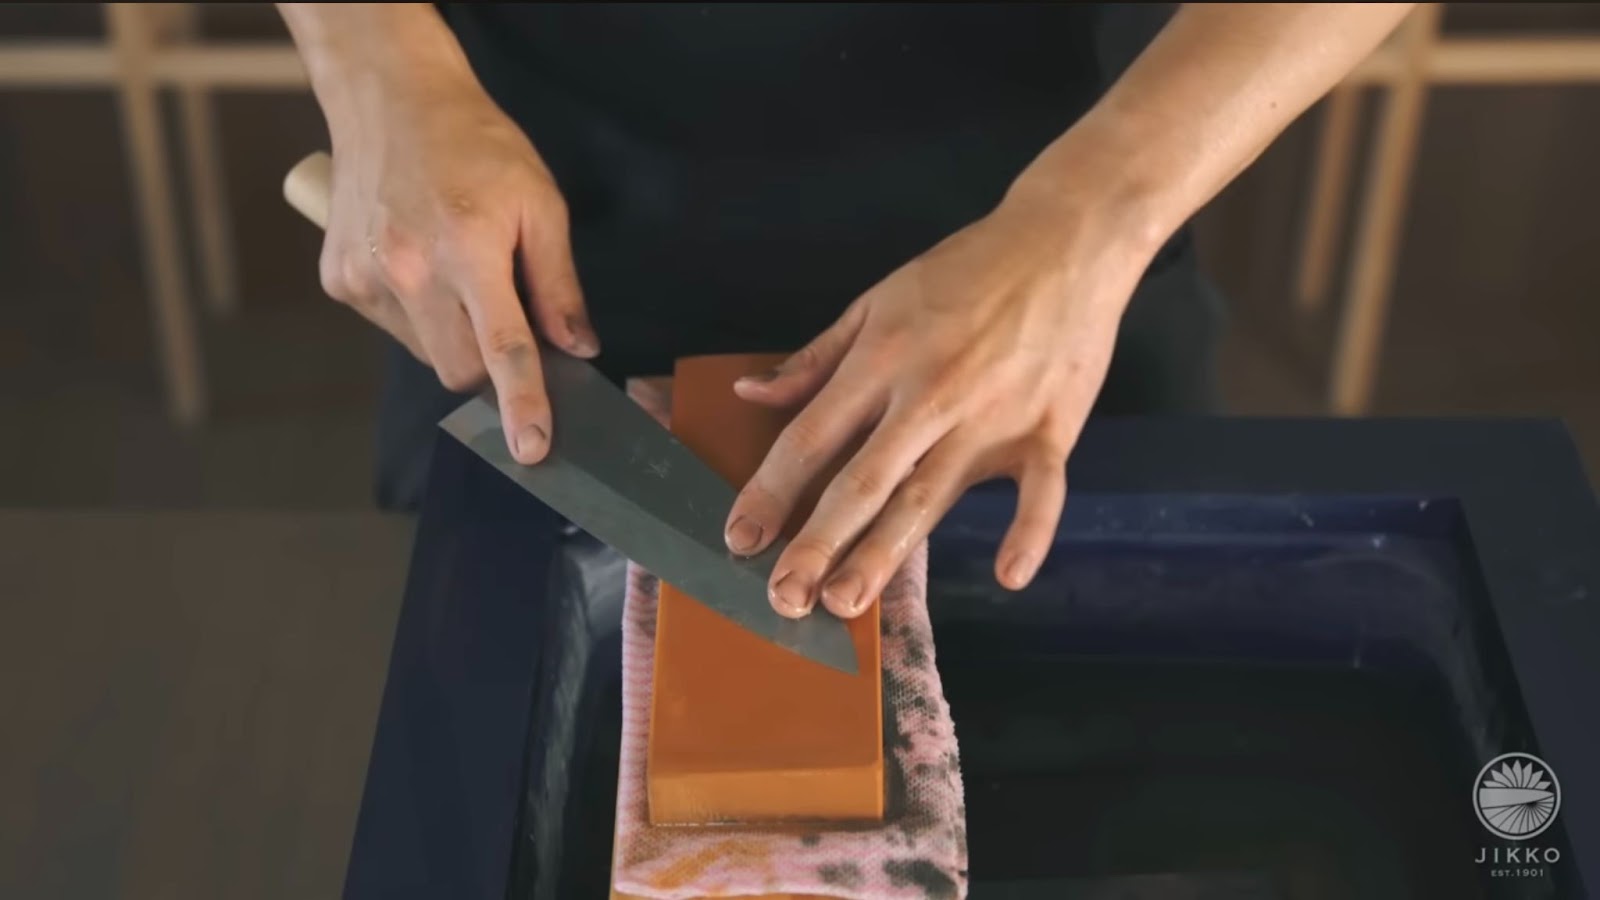
Finishing Touches: Final Polishing Methods
After sharpening the knife with a 1000-grit whetstone, use a finishing whetstone to complete the process. Sharpening with a finishing whetstone ensures that the blade's sharpness lasts longer.
Using the finishing whetstone(No. 6000)
Like with the 1000-grit whetstone, start by flattening the finishing whetstone using a leveling stone before beginning the sharpening process.
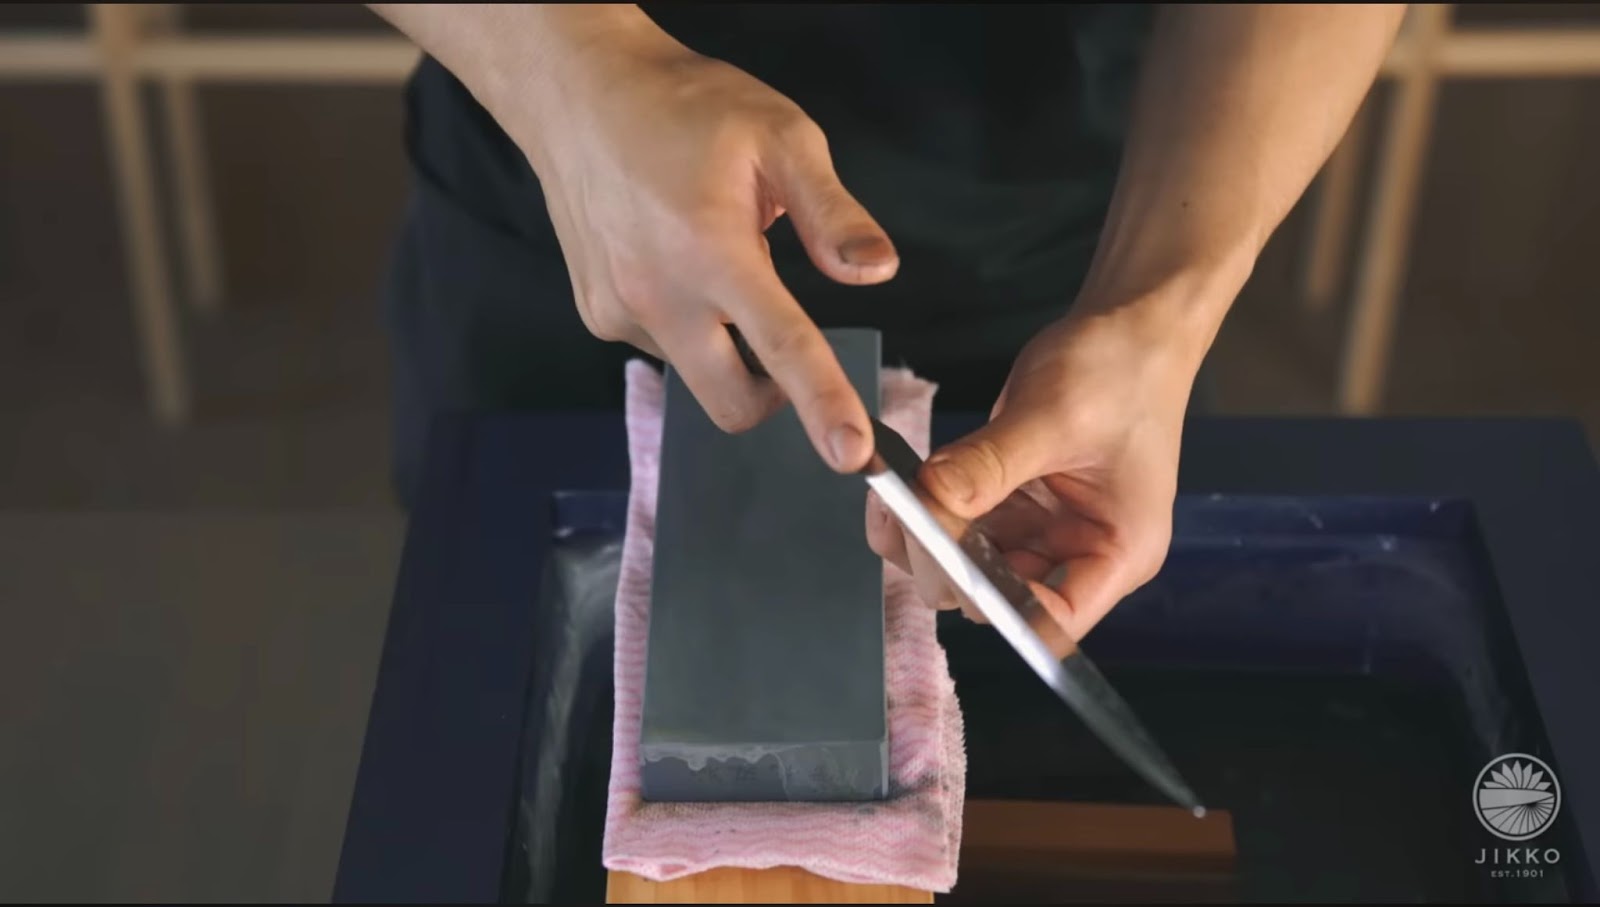
First, perform a technique called "uraoshi," where you sharpen the backside of the knife. Unlike the 1000-grit stage, where the knife was tilted to align the cutting edge with the whetstone, for the backside, ensure the entire flat surface of the backside lies flush against the whetstone.
The number of strokes should be just enough to remove the burrs that were formed earlier. If no burrs remain after sharpening, the process is complete.
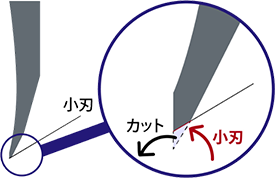
Micro-Beveling(Kobatsuke)
Turn the knife over to the front side and perform Kobatsuke (micro beveling). This step refines the edge in areas that were not fully sharpened with the 1000-grit whetstone and helps improve the durability of the sharpness.
Unlike the previous sharpening process, where the entire bevel was placed against the whetstone, Kobatsuke involves focusing only on the very edge. To do this, slightly lift the blade to position only the edge against the whetstone, then sharpen carefully.
Sharpen the knife by sliding it from the tip of the blade to the heel (the base near the handle). Perform this motion about 10 times. Afterward, check for burrs. If burrs are present, the Kobatsuke process is complete.
Backside Polishing(Uraoshi)
When performing Uraoshi (backside polishing), it's important that the whetstone is perfectly flat. If the whetstone is not level, the shape of the knife will be distorted. Before starting the polishing, don't forget to use a leveling stone to ensure the whetstone is flat.
Once the whetstone is prepared, place the backside of the knife flat against the stone, making sure the entire surface of the backside contacts the whetstone. Sharpen until the burrs are removed.
Check the knife to ensure all burrs have been removed. If so, the sharpening process with the whetstone is complete.
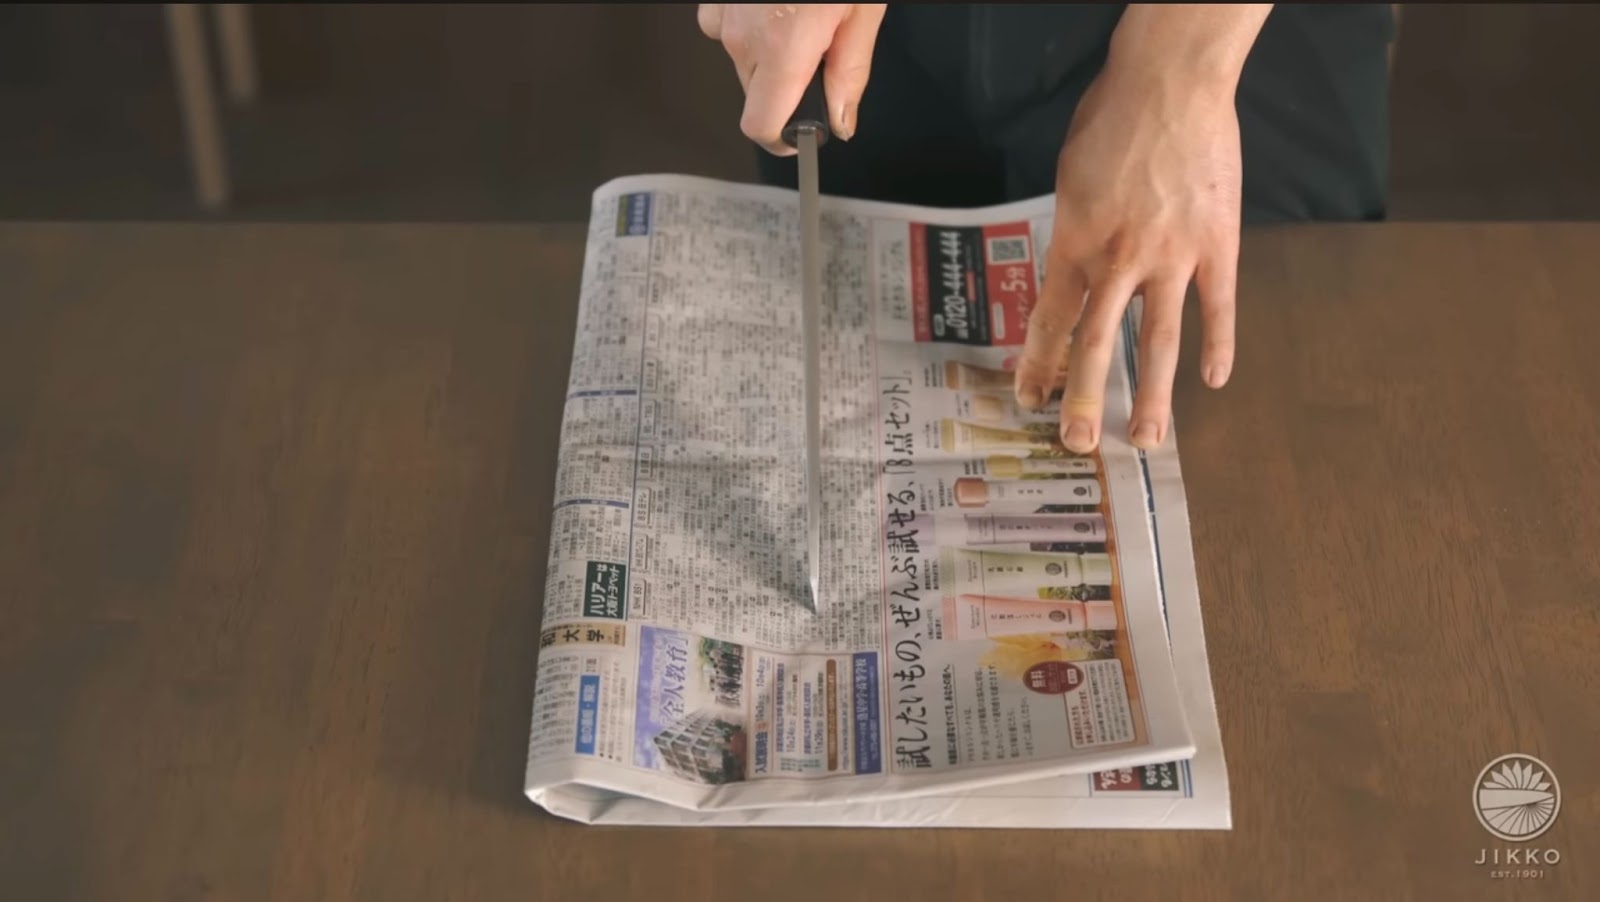
Check the sharpness of the knife
Finally, use a newspaper to check whether the knife blade has been properly sharpened. Place the newspaper on a table and lightly rub the blade against it to clean off any metal residue left from the sharpening process.
Next, place the knife on the newspaper, press the edge lightly against it, and gently pull. If the knife feels like it grips the paper without sliding, it indicates that the edge has been properly sharpened and is in good condition.
Beginner-Level Deba Knife Sharpening Video Tutorial
Advanced Techniques: Expert-Level Deba Knife Sharpening
In the advanced section, we will skip the basic sharpening techniques and focus on key points. Pay special attention to the following three aspects:
・Using the whetstone Properly
・Understanding the Knife’s Structure
・Creating a Clam-shaped Edge (Hamaguri-ba)
Using the whetstone Properly
When using a whetstone, it’s important to ensure even wear across the entire surface, not just the center. This not only extends the life of the whetstone but also ensures the knife is sharpened evenly, maintaining its proper shape and performance.
Understanding the Knife’s Structure
Be mindful of the knife's construction while sharpening. For example, a Deba knife consists of two materials: steel (hagane) and soft iron (jigane). Steel is harder and wears down slowly, whereas soft iron is softer and wears down more easily. By considering these differences during sharpening, you can maintain the knife’s shape without distortion.
Creating a Clam-shaped Edge (Hamaguri-ba)
The Hamaguri-ba is a technique where the edge is slightly rounded to improve strength and reduce the risk of chipping. This shape makes the blade more durable while enhancing its cutting performance. Rather than a straight edge, the blade has a gentle curve at the tip, resembling the shape of a clam. Sharpening to achieve this profile requires precision and control to balance sharpness and durability.
Pro-Level Steps to Sharpen a Deba Knife
From here, I will explain the step-by-step process of sharpening a knife and highlight the key points.
Grit Levels and Sharpening Techniques
First, reshape the knife. If the tip is bent or the blade’s shape is distorted, use a 240-grit coarse whetstone to correct it. When reshaping the knife, be careful not to grind only the bent parts but to shave the entire blade evenly.
Coarse whetstones grind quickly, so it’s better to check the progress frequently after sharpening a little. Since coarse whetstones also wear down quickly, regularly flatten the surface with a leveling stone during the sharpening process.
By focusing on the steel (Hagane) section during sharpening, you can maintain the knife’s shape without distorting it. If you want to sharpen the steel section specifically, move your left hand closer to the tip of the blade while sharpening. When checking the shape of the knife, bring the blade up to your eye level and use one eye to inspect it for better visibility.
Forming a Clam-shaped Edge (Hamaguri-ba)
To create a Hamaguri-ba, start by using a coarse whetstone to shape the blade roughly. Afterward, refine the shape using a medium-grit whetstone and finish with a fine-grit whetstone.
By being mindful of the differences between the steel (Hagane) and soft iron(JIgane)sections while sharpening, you can achieve a clean and precise Hamaguri-ba. Placing the tips of your left fingers on the edge or the shinogi (the ridge line on the blade) allows you to adjust the area you are sharpening.
Since the shinogi area is easier to sharpen, focus slightly more on the blade edge to achieve a balanced and clean finish.
Tips for Using the Whetstone
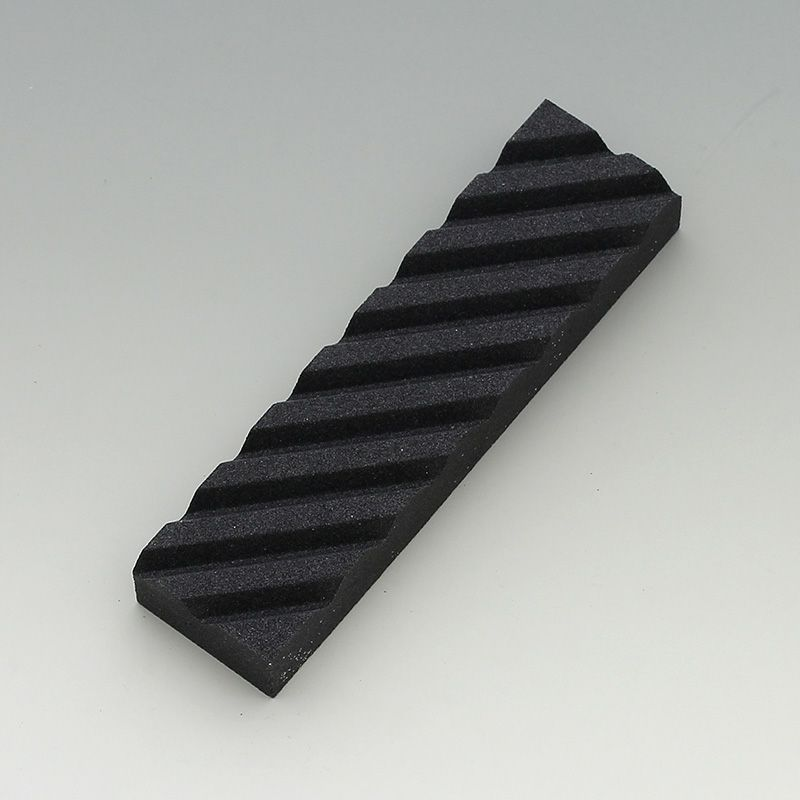
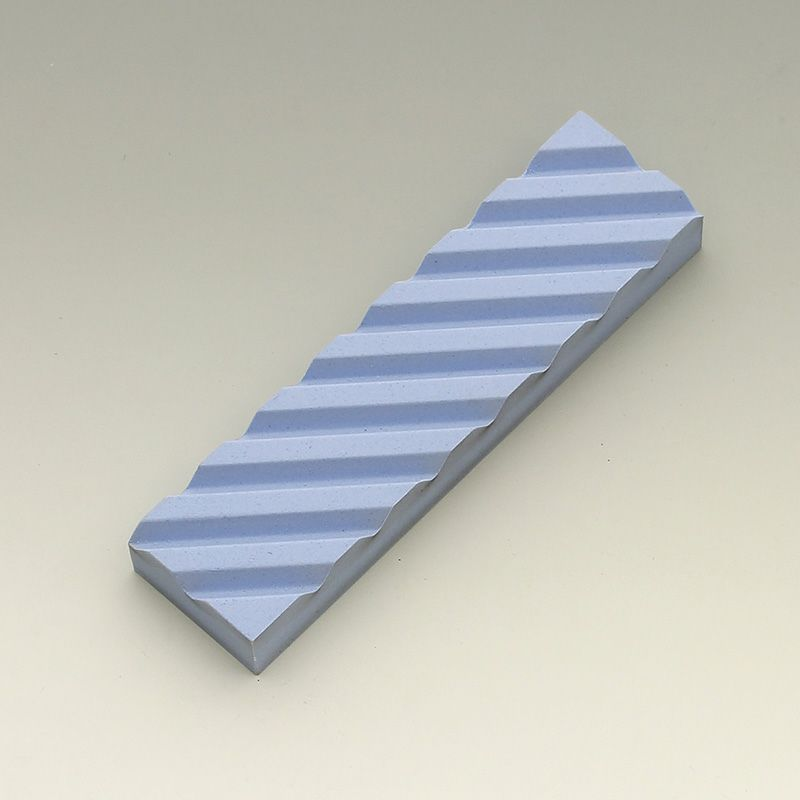
It’s important to make adjustments in how you use the whetstone. For harader-to- reach areas, such as the tip of the blade or the heel, use the edges of the whetstone for more efficient sharpening.
Specifically, when sharpening the tip of the blade, use the part of the whetstone closer to you. Conversely, when sharpening the heel (ago) of the knife, use the far end of the whetstone. This approach ensures you make use of the entire surface of the whetstone evenly.
|
When Using the Front Side of the Whetstone |
When Using the Upper Side of the Whetstone |
|
|
|
However, this technique can be a bit challenging for those who are not yet experienced, so caution is necessary. It is not highly recommended for beginners.
Whetstone Progression
The recommended progression for whetstone grits is
#240→#400→#1000→#3000→#6000→#10000
Gradually increase the grit size, refining the scratches left by the coarser grits to achieve a smoother and sharper finish.
When using a grit higher than #3000, the amount of material removed decreases significantly. At this stage, focus mainly on sharpening the steel (Hagane) section of the knife to achieve optimal results.
It is not strictly necessary to use all the grits mentioned above. Using just three typesーcoarse stone→medium stone→finishing stoneーis sufficient for sharpening. However, using finer grits provides a more polished finish and makes the sharpening process smoother and easier.
【Check Whetstones By Jikko Cutlery】
The Final Edge: Polishing and Finishing
Kobastuke (Micro-Beveling)
Kobastuke refers to the process of creating a specific edge angle on the blade. This makes the knife more resistant to chipping and helps maintain its sharpness for a longer period. Depending on personal preference, some may choose not to apply a micro-bevel.
For this process, use whetstones with grits of #6000, #10000, or #13000. After sharpening the edge and applying the micro-bevel, finish with uraoshi (backside polishing). Be cautious not to overdo the uraoshi process, as excessive polishing can remove the hollow grind (urasuki) on the back of the blade.
Checking the Sharpness of the Knife
Once sharpening is complete, check the sharpness using a piece of newspaper. Before testing, gently rub the blade on the newspaper to remove any residual burrs. Place the knife edge against the paper, and if the blade doesn't slip, it indicates that the edge has been properly sharpened.
You can also check the sharpness by smoothly cutting through standard copier paper to ensure the blade glides effortlessly through it.
Advanced Deba Knife Sharpening Video Guide
Frequently Asked Questions About Deba Knife Sharpening
Q: How do I sharpen a stainless Deba knife?
A: The same basic technique applies to both stainless and carbon steel Deba knives. First, soak your medium-grit whetstone (around #1000) and fine-grit finishing stone (#6000 or higher) in water for 10–15 minutes. Next, hold your Deba knife (which is single-beveled) at about a 15–20° angle against the stone and sharpen by pushing the blade away from you.
Move consistently across the entire bevel so you don’t end up with uneven sharpening. After you’ve finished the primary bevel, lightly sharpen the back of the blade to remove any burr. Then switch to the finishing stone to refine the edge and achieve razor-sharp results. Finally, wipe off any remaining burr with newspaper. Stainless steel resists rust, making it easier to care for, but regular sharpening is still important to maintain peak performance.
Q: Which is better for a Deba knife—using a whetstone or a sharpener?
A: Because Deba knives focus on precision and clean cuts, using a whetstone is generally recommended. Whetstones allow for careful edge maintenance, helping you restore a razor-sharp finish or adjust the blade geometry as needed. A handheld or pull-through sharpener can be handy for quick touch-ups on regular kitchen knives, but it typically doesn’t provide the long-lasting sharpness that a whetstone does. Therefore, if you want to preserve the Deba’s superb cutting ability—especially for fish—you’ll get the best results using a whetstone.
Q: When should I sharpen my Deba knife?
A: A good rule of thumb is to sharpen your Deba whenever you notice its cutting performance has slipped—for instance, when slicing through fish or meat becomes less smooth, or the blade starts to crush or tear rather than cleanly slicing. Some professionals prefer touching up their blade after every use to maintain peak sharpness, though this level of attention may not be practical for everyone. Another quick check is to gently feel the edge with your fingertip; if it no longer feels sharp, it’s time to sharpen.
Q: How do I check if my Deba knife is sharp?
A: One simple test is to slice a sheet of newspaper or regular paper. If the blade glides through without snagging, your knife is in good shape. Another method is to take a piece of tissue or kitchen paper, lightly roll it up, and try slicing it as though you’re cutting a soft vegetable. If the knife goes through easily, you can be confident that you’ve got a well-sharpened blade.
Q: Do I need to soak my whetstone before sharpening my Deba knife?
A: For most synthetic stones, yes. Submerge your whetstone in water for about 10–15 minutes before use, allowing the stone to absorb enough moisture to reduce friction and disperse metal shavings. That ensures a smoother sharpening process and helps protect your blade. However, certain natural or very soft whetstones can be damaged by prolonged soaking. In these cases, just wet the surface before sharpening and add water as you go to keep the stone sufficiently lubricated.
Q: What grit whetstone is best for sharpening a Deba knife?
A: It depends on the condition of your blade. For everyday maintenance, a medium-grit stone around #1000 is ideal. If your Deba has nicks or chips, start with a coarse stone (#220–#600) to restore the edge before moving on to a medium-grit. To achieve an ultra-fine finish, follow up with a high-grit finishing stone (#6000 or higher). This multi-step approach gives you a smooth edge and ensures maximum cutting efficiency.
Conclusion: Mastering Your Deba Knife Sharpening Skills

By now, you’ve gained a thorough understanding of the unique features of the Deba knife, why proper sharpening is crucial, and how to advance from basic to expert-level techniques.
Consistent practice and attention to detail—such as maintaining the correct blade angle, choosing the right whetstone grit, and applying steady pressure—will help keep your Deba knife in top condition. Whether you’re filleting fish or breaking down other ingredients, a well-sharpened Deba knife is key to achieving precision and efficiency in the kitchen.
Don’t forget to revisit our video tutorial whenever you need a visual refresher, and continue exploring the art of Japanese knife maintenance to elevate your culinary creations.